|
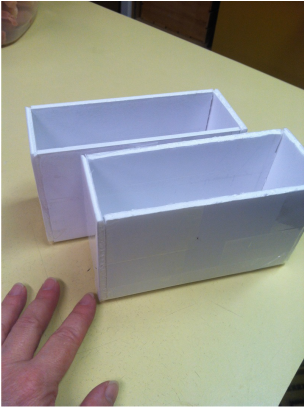
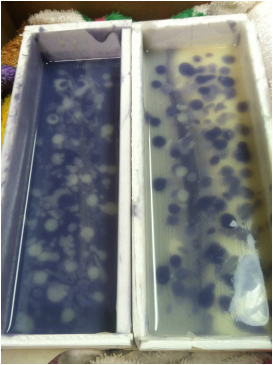
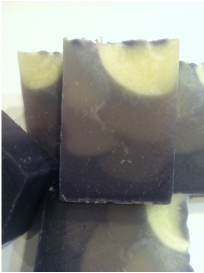
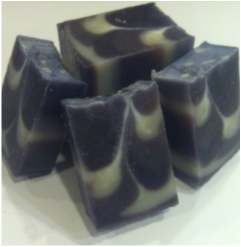
As promised, here are the first two attempts at the shimmy. I am going to elaborate a little more here on the technique. First, I made some Tall & Skinny molds out of foam board. Along with the Shimmy Soap Technique, Amy Warden, of Great Cakes Soapworks, also gave us a link on how to make these soap molds - both the technique and the mold are taught by a guest instructor Tatiana Serva - click here to see her blog showcasing her amazing soaps!. These molds hold a little over 1 lb of soap, which is great for playing around and not using a large amount of ingredients - in case it doesn't come out as expected. So, after making the molds, I modified my soap recipe to fit. I set up my area with seven cups, and added a bit of color to each. For the Harvest Shimmy I used charcoal, rose clay, oil infused with annatto seed, oil infused with alkanet root, red Moroccan clay, sea clay, and cocoa. For these first two batches, I prepared two separate pots of soap - one was left uncolored, the other was made with oils infused with alkanet. These were then mixed into a gradient of hues from dark purple to a natural "white". Once the soap was at a very light trace, I divided the batch into seven equal amounts (by weight) into the prepared cups. For the second batch, I just used up what was left over, which was really just "natural white", a darker purple and a medium purple. I did not take photos of the process as I went. I will have to remember to do that next time, easier said than done when you are busy with so many processes, and learning a new technique to boot. I'm sure that is why many people video tape the process for these challenges :) The way you make these soaps is by propping one side up on a pencil and pouring down the other side in a back and forth motion until it is all in. You then prop the other side up and pour the next color down the other side. Repeat this process, alternating sides, until it is all poured. I poured the entire 1/7 th of the batch for each color, although others have done a varying amount to create a different effect. If you google Tall & Skinny Shimmy and look at the videos, you will get a better feel for how this technique is accomplished. Here is the soap after pouring into the molds. And now for the unmolding of the soaps and cutting them into bars. The soap did not want to release from the mold right away, so I decided to place them in the freezer for a few minutes. This worked wonderfully for removal from the mold, however the freezing process seems to create small fractals in the soap, which are visible in the the photos below, taken the following day. Pretty neat technique, all in all. I really enjoyed doing this, and I have to say that my results were fairly decent as well. I look forward to participating in future soap challenges, and hope you come back to see the attempts I make.
0 Comments
Your comment will be posted after it is approved.
Leave a Reply. |
Details
TaralynColorado Artisan, making beautiful hand-crafted soaps with all natural ingredients. Archives
August 2025
CategoriesCategories
Comment Policy
We follow Grandma's rule here: If you don't have something nice to say, don't say anything at all. While constructive criticism is always welcome, keep it polite, considerate and friendly. These are simple rules that, if not followed, will result in the deletion of the comment. Thank you. |
|
|
Our soaps and body care products are handcrafted the old-fashioned way, in Boulder County, Colorado by your local Soap Making Artist, Taralyn. Small artisan batches allow for considerable attention to detail during all stages - soap making, hand cutting, six week cure time and hand wrapping - an extensive journey that nurtures the formation of the perfect bar of luxury soap. And to make it even better, we will deliver to your door! Shop by Signature or Artisan, by scent families, ingredients or by name. So much to explore! Check out our collections today!
|
Contact
|
About
Get to Know Your Soap Maker!
|
Customer Service
ASC Creative Credits
|
Other Goodies
Community Connection Blog
Wild Rovings Blog
Why Palm Oil?
Organic Label
|
Copyright © 2009-2025 ASC Soapworks, llc, All rights reserved.


 RSS Feed

